The existing integration between AEOS Access Control system and Milestone XProtect® is an outstanding plugin that allows you to enjoy, in a single environment, the advantages of two industry-leading software solutions. The full-featured access control system of AEOS integrated into the open platform of the Milestone VMS, XProtect®.
Access control and video management in a single platform gives you control of your site, and control about the security of your facilities. If you could simply add the intrusion into this platform, then you would have the whole security management into one environment, with a single interface, having a tight relation between systems… Who says you can’t?
The new plugin developed by SGSE, AEOS Intrusion Monitor, allows you to integrate also the AEOS Intrusion system into Milestone as an intrusion system, so you can have a VMS that allows you to monitor and manage your access control systems and at the same time your intrusion system… Sounds good, doesn’t it?
Extremely simple configuration
The way to integrate the AEOS Intrusion system into Milestone is extremely simple. Just enable and configure the Socket Interface in your AEOS Server, set up the communication parameters at the plugin to connect to AEOS through that interface, and… that’s it!
The plugin will import all the areas and detectors defined in the AEOS Intrusion system and create all the corresponding items in Milestone. The plugin is ready to work! No further configuration is required for the plugin to operate, although some fine tuning might be wanted for the operators to have a better idea of the intrusion system and to get a completely useful integration, like specifying the kind of detectors, adding intrusion elements to maps or defining the alarms that must be triggered upon receiving AEOS intrusion related events.
The plugin allows the user to define the type of detector by selecting from a set of kinds. This will change the icons of the detectors on the Smart Client maps. The available detector kinds are:
Volumetric
Seismic
Glass break
Magnetic contact
Panic button
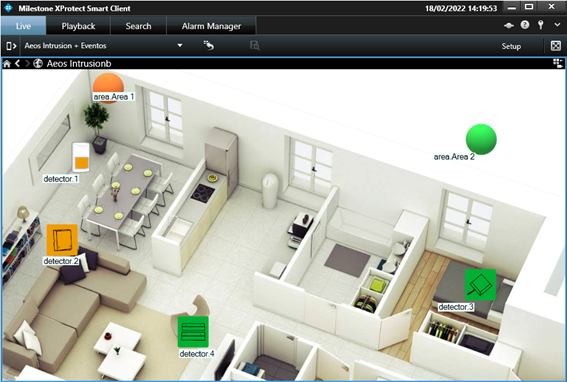
You can drag and drop intrusion elements (as you can do with cameras, inputs, outputs…) into maps so that you can easily locate them, see their status and perform commands on them.
Alarms
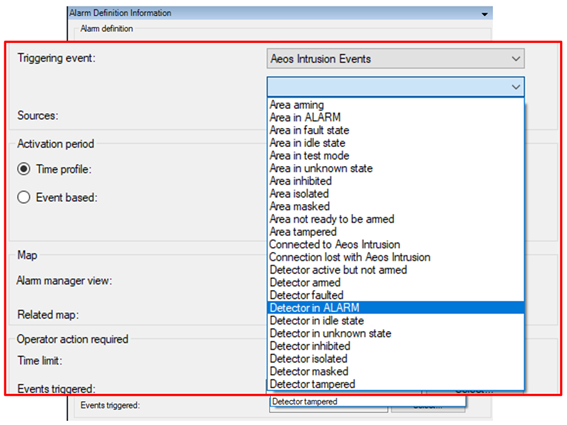
The plugin defines a set of events that are triggered by the AEOS Intrusion integration. These events can be used to define alarms by selecting which of them, when triggered from specific sources, must be considered as alarms.
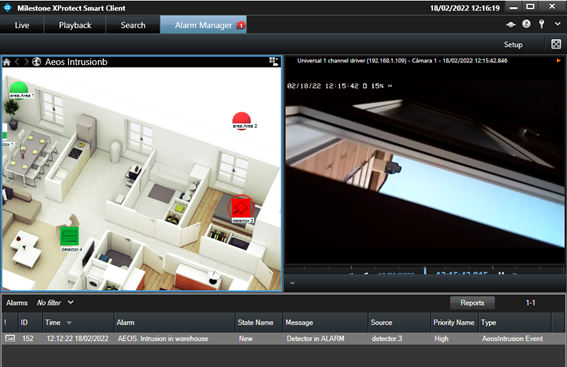
For example, you can define an alarm in Milestone when the “Detector in ALARM” event is triggered from any detector. This way, whenever any detector goes into alarmed state in AEOS Intrusion systems, an alarm will be fired in Milestone. You can associate cameras to alarms on specific zones, so that the alarms are bound to the images of one or more cameras.
Rules: events and actions
The same events that can be defined as alarms, can also be used to trigger rules in Milestone. This way, you can use any of the AEOS Intrusion events to perform any available action in Milestone: move a PTZ camera, start recording, show a camera on screen, activate an output, send an email…
As an example, you may want to move a PTZ camera to a specific preset when one of the detectors, let’s say, back corridor, is active (it is detecting something) but the area is not armed, so it’s not an alarm. Then you can create a rule so that the “Detector active but not armed” event coming from the detector located at the back corridor is the triggering event, and as an action you move the associated PTZ camera to the preset that looks at the back corridor.
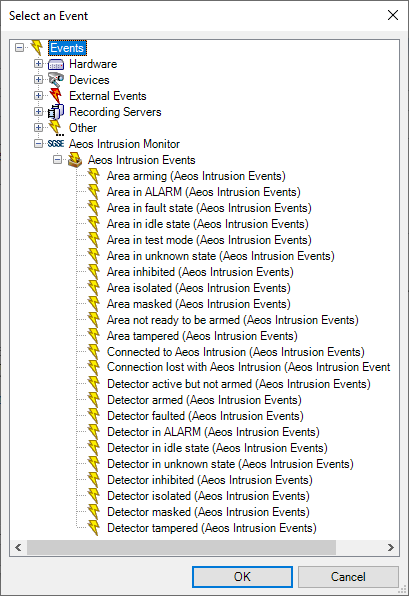
The available events to define alarms or trigger rules are the following:
Area arming
Area in ALARM
Area in fault state
Area in idle state
Area in test mode
Area in unknown state
Area inhibited
Area isolated
Area masked
Area not ready to be armed
Area tampered
Connection established to AEOS Intrusion system
Connection lost with AEOS Intrusion system
Detector active but nor armed
Detector armed
Detector faulted
Detector in ALARM
Detector in idle state
Detector in unknown state
Detector inhibited
Detector isolated
Detector masked
Detector tampered
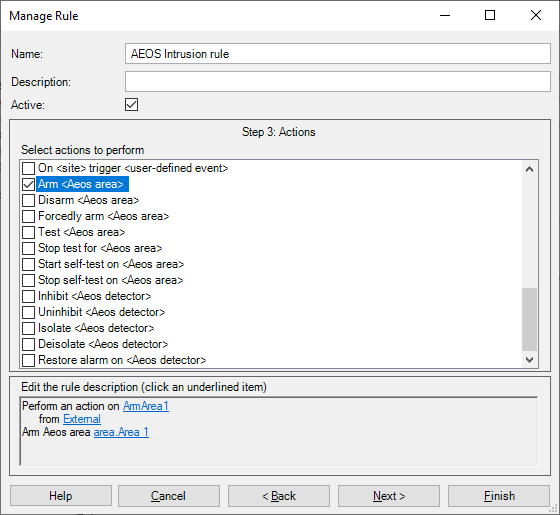
But with this plugin you can also perform actions into the AEOS Intrusion system triggered by any event that occurs in Milestone.
For example, when access is granted at a specific door to a specific person, you could disarm a specific intrusion area. Or you could also automatically inhibit a detector in a specific period of time (every Monday at 7:00), disinhibiting it later (at 8:00) because the maintenance guy is coming every Monday to do some works within that time. Or even arming an intrusion area when a camera stops recording…
The actions you can automate are the following:
Arm an area
Disarm an area
Forcedly arm an area
Test an area
Stop test on an area
Start self-test on an area
Stop self-test on an area
Inhibit a detector
Disinhibit a detector
Isolate a detector
Deisolate a detector
Restore alarms on a detector
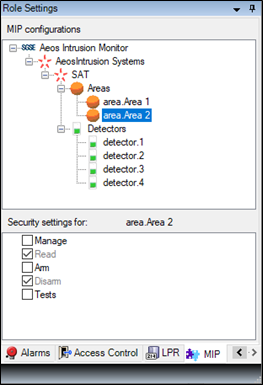
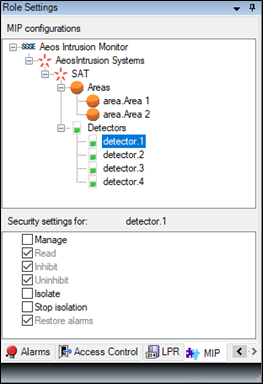
Permissions
This plugin lets you assign users with specific permissions on specific intrusion elements. For example, you could create a role that can inhibit and disinhibit detectors, but they cannot isolate them. Or a role can be assigned permissions to arm areas, but not to disarm them. You can specify also different permission on different objects of the same type, maybe a role can have full rights on a set of areas and detectors (those in one building), but they cannot even see the rest of areas and detectors (that might belong to other buildings).
Of course, you if you don’t need such a tailored permission management, you can also give general permission on all elements of a kind 😉.
How does it work
The operator can interact with the AEOS Intrusion system and send commands to the areas or to the detectors.
Monitoring and every manual interaction is performed from the Smart Client, which is the standard user interface in Milestone XProtect®.
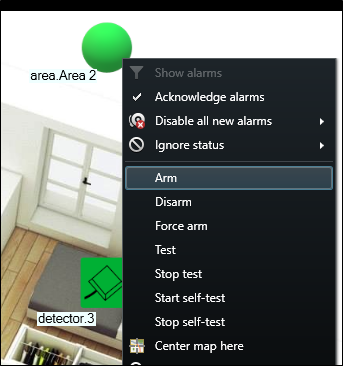
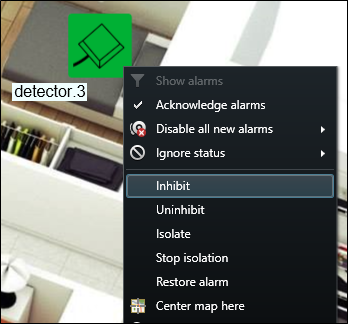
The main tool to monitor and interact with the systems are Smart Client maps, where you can easily see with the icons where the intrusion elements are located, the type of detector, and their state. Additionally, the icons also let you interact with the corresponding item, through their context menu (secondary button of the mouse).
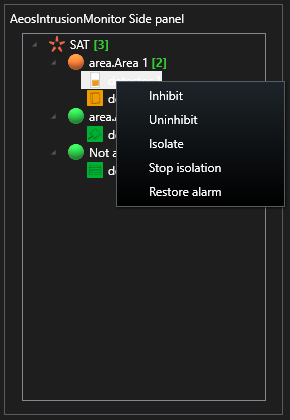
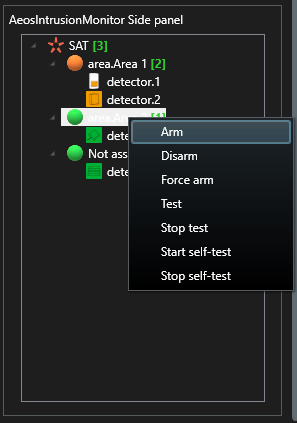
This way, you can interact with areas to arm, disarm, forcedly arm, test, stop test, start self-test or stop self-test, and with detectors to inhibit, disinhibit, isolate, deisolate or restore alarms:
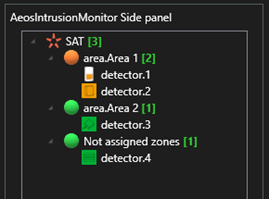
To have a quick overview of the system in every moment, you can see the areas and their associated detectors in the side panel tree view.
The icons represent their state, as they do on the maps, and allow you to directly interact with them, performing the same commands that can be performed from the maps through the context menu of each item.